
What is a Convolutional Neural Network (CNN)? A Beginner-Friendly Guide
A simple introduction to CNN and how it powers modern image recognition
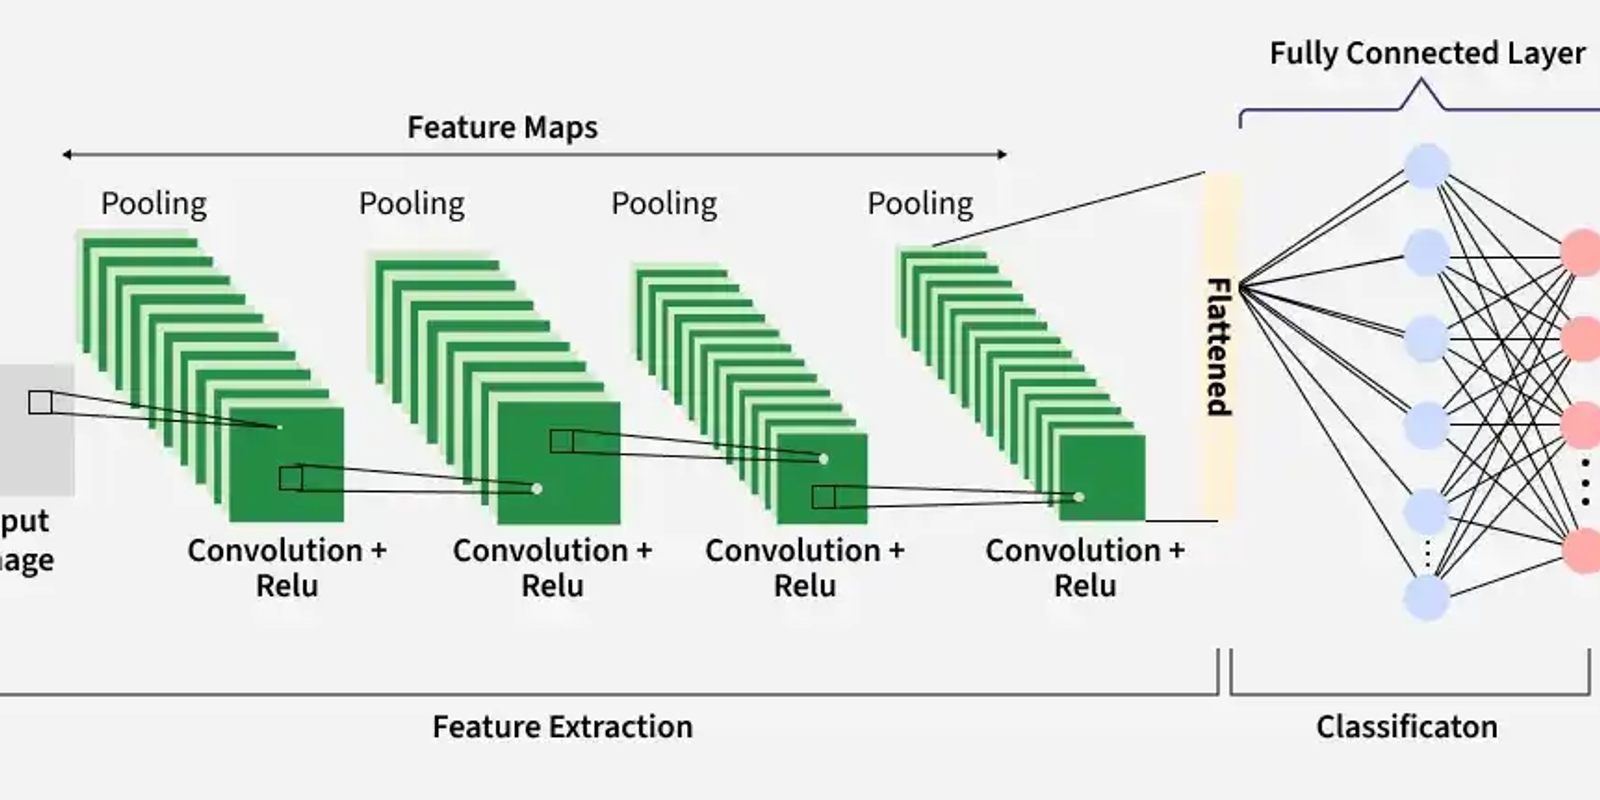
Convolutional Neural Networks (CNNs), also known as ConvNets, are neural network architectures inspired by the human visual system and are widely used in computer vision tasks. They are designed to process structured grid-like data, especially images by capturing spatial relationships between pixels.
- Automatically learn hierarchical features through convolution operations, from simple edges and textures to complex shapes and objects.
- Detect objects at different positions within an image, ensuring robustness to spatial variations.
- Reduce computational complexity by processing local regions instead of the entire image at once.
Key Components of CNN
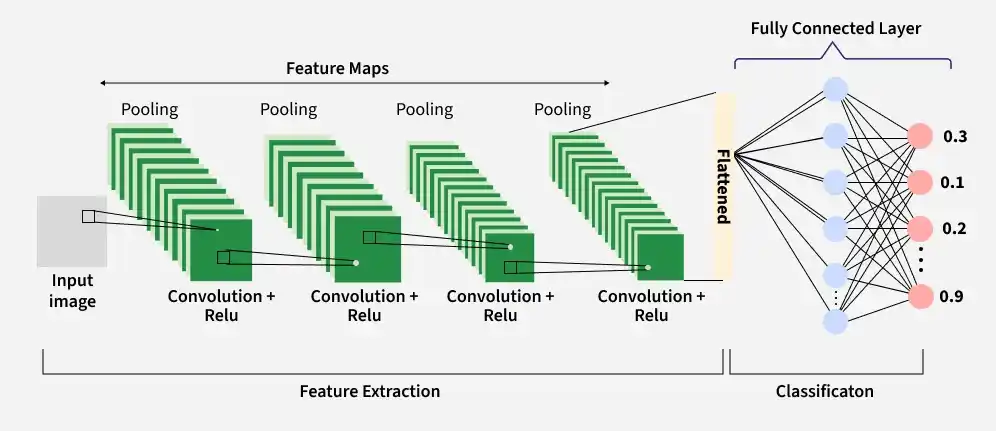
A complete Convolution Neural Networks architecture is also known as covnets. A covnets is a sequence of layers and every layer transforms one volume to another through a differentiable function.
Let’s take an example by running a covnets on of image of dimension 32 x 32 x 3.
1/ Input Layer
The input layer receives the raw image data and passes it to the network for processing. In CNNs, input is typically a 3D volume (width x height x depth)
- Stores pixel values of the image (e.g 32 x 32 x 3 for RGB images)
- Preserves the spatial structure of the image for further feature extraction
2/ Convolution Layer
The Convolution Layer is responsible for extracting important features from the input data. It applies a set of learnable filters (kernels) that slide over the image and compute the dot product between the filter weights and corresponding image patches, producing feature maps.
- Use small filters (e.g 2x2, 3x3, 5x5) to scan the input image.
- Generates feature maps that capture patterns such as edges, textures and shapes
Example: Using 12 filters results in an output volume of 32 x 32 x 12
3/ Activation Layer
The Activation Layer introduces non-linearity into the network by applying an element-wise activation function model to learn complex patterns beyond linear relationships.
- Common activation functions include ReLU, Tanh and Leaky ReLU.
- Applied element-wise to the feature maps
- The output dimensions remain unchanged (e.g 32 x 32 x 12).
4/ Pooling Layer
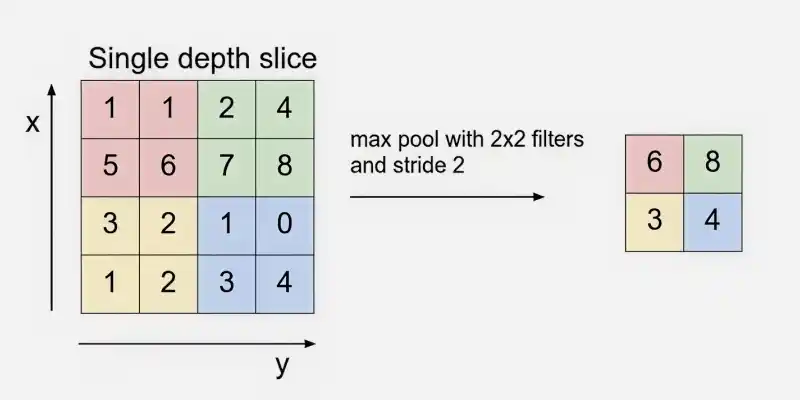
The Pooling Layer is used to reduce the spatial dimensions of the features maps, making computation faster, reducing memory usage and helping to prevent overfitting. It is typically inserted between convolutional layers in a CNN.
- Common types include Max Pooling and Average Pooling
- Reduces width and height while keeping depth unchanged
Example: Using 2x2 max pooling with stride 2 reduces the volume from 32 x 32 x 12 to 16 x 16 x 12
5/ Flattening
Flattening converts the multi-dimensional feature maps into a one-dimensional vector after convolution and pooling. This vector is then passed to the fully connected layer for classification or regression.
6/ Fully Connected Layer
The fully connected (dense) layer performs high-level reasoning using extracted features and produces the final classification scores
Example: The 3072 - length vector is connected to neurons for classification
7/ Output layer
The output layer converts final scores into probabilities using activation function like Sigmoid (binary classification) or Softmax (multi-class classification)
Example: For 10 classes, Softmax produces 10 probability values each representing the likelihood of class
How Convolutional Layers Work
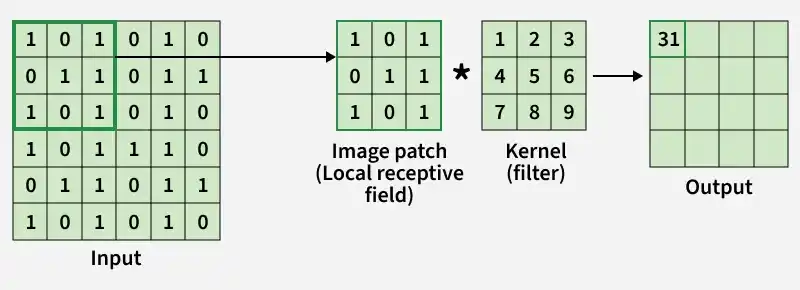
- A small matrix called a filter (kernel) slides over the input image to extract important features
- At each position, the filter performs element-wise multiplication with the image patch.
- The multiplied values are summed together to produce a signle output value.
- This operation is repeated across the entire image using a defined stride.
- The result is a new matrix called a feature map, which highlights detected patterns.
- Multiple filters are applied to capture different features such as edges, textures and shapes.
- The process preserves spatial relationships while reducing the number of learnable parameters compared to fully connected layers.
- Padding can be used to control output size and prevent loss of border information
Step By Step Implementation
Here we implement a Convolutional Neural Network illustrating how each layer processes and transforms the input image.
Step 1: Import Required Libraries
Here we import TensorFlow for CNN operations and Matplotlib for visualization.
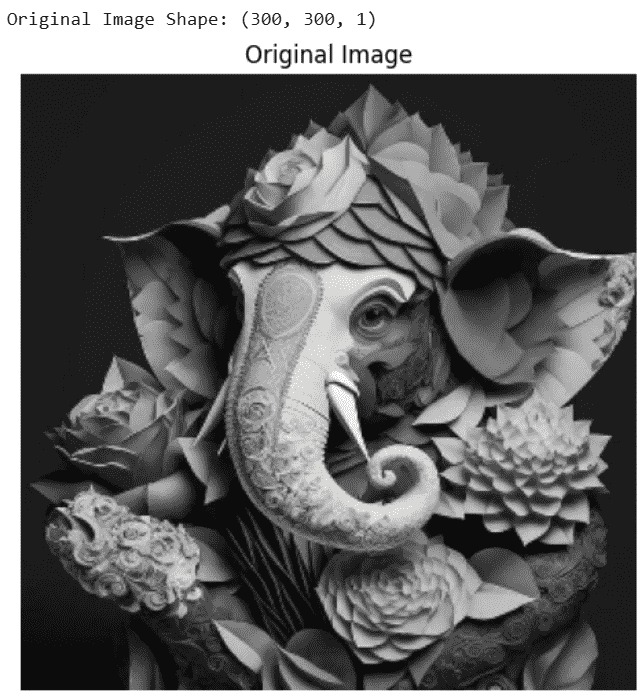
Step 2: Load and Preprocess the Image
Load the image convert it to grayscale, resize it to 300×300 and normalize pixel values.
Output:
Step 3: Define Convolution Kernel
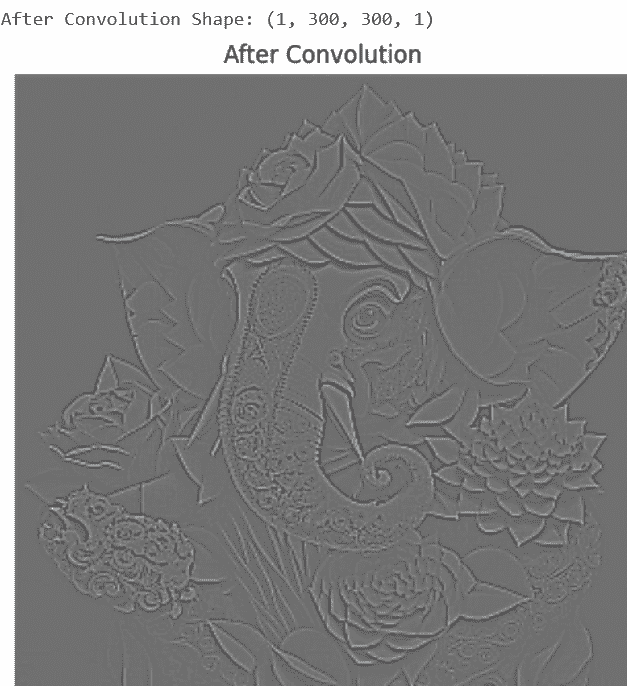
We define an edge detection filter (Laplacian kernel) to extract important image features.
Step 4: Apply Convolution Layer
The convolution layer applies the filter to the image to detect edges and features.
Output:
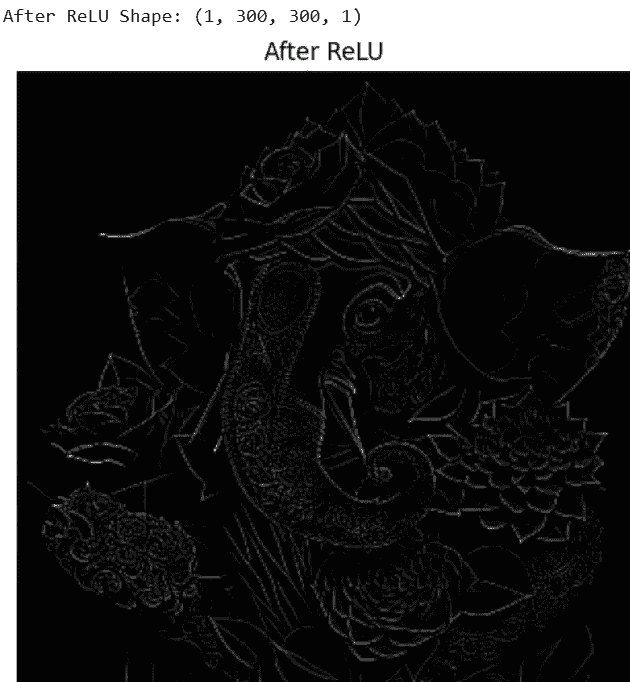
Step 5: Apply ReLU Activation Function
ReLU removes negative values and introduces non-linearity into the network.
Output:
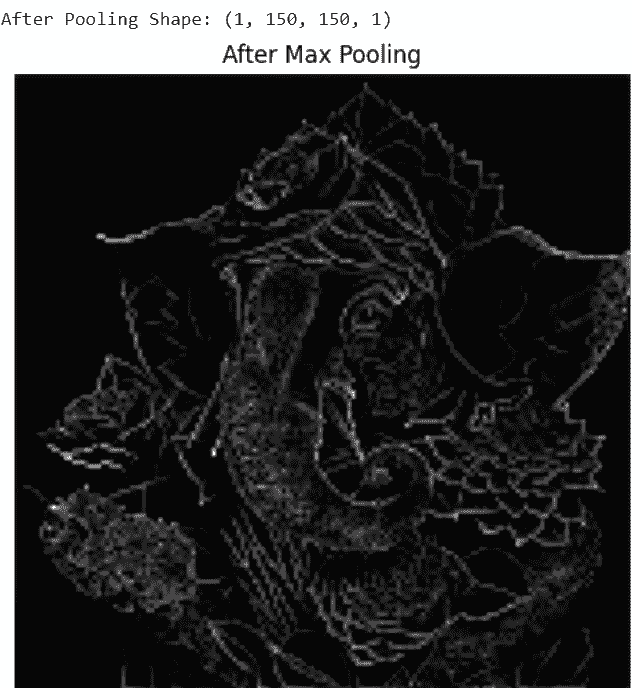
Step 6: Apply Max Pooling Layer
Max pooling reduces spatial dimensions while keeping important features.
Output:
Step 7: Apply Flatten Layer
The flatten layer converts 2D feature maps into a 1D feature vector for fully connected layers
Output:
Step 8: Add Fully Connected (Dense) Layer
The fully connected layer learns high-level patterns from the flattened feature vector and produces output predictions.
Output:
Advantages
- Automatically learn important features from images, videos or audio without manual extraction.
- Highly effective at detecting spatial patterns, edges, textures and shapes.
- Robust to variations like translation, rotation and scaling in input data.
- Can handle large datasets and achieve high predictive accuracy.
- Supports end-to-end training, simplifying the model pipeline.
Limitations
- Training is computationally intensive and requires significant memory.
- Prone to overfitting if data is limited or regularization is insufficient.
- Requires large amounts of labeled data for optimal performance.
- Limited interpretability difficult to understand learned features.
- Sensitive to adversarial examples and noise in input data.
First Lesson
You are at the beginning of this curriculum.
Latest Tutorial
More chapters coming soon to this topic.

Leave a Reply
Share your insights, questions, or solutions with the developer community.
Discussion
0No comments yet
Be the first to share your thoughts, question a concept, or provide additional tips!